How to Add a Payment Gateway to an Adobe Express Add-On (Without Losing Your Mind)

If you’re building an Adobe Express add-on and wondering how to collect payments from users, you’ll run into this quickly: Adobe doesn’t provide a payment service for you. Official monetization guidance is clear: Checkout is handled by you outside of Express (per the Adobe Express add-on monetization guidelines). That isn’t a blocker; it just means you need a small, normal web backend and a payment provider.
This blog walks through the flow in plain order, step by step.
The whole system in six steps
Before frameworks or dashboards, you need to understand the following loop:
A user taps Subscribe in your add-on.
Your server asks the payment provider (Stripe, Dodo, Paddle, etc. ) for a checkout session and gets back a URL.
The user pays on the payment provider’s hosted page.
The provider sends a webhook to your server. This is how you know payment really happened.
Your database adds the user’s subscription and updates customer IDs.
The add-on calls your “status” API and updates the UI.
If that loop is clear, the rest is easy. Otherwise, tutorials feel confusing.
What you actually need (three pieces)
1. A backend
Any stack is fine: Node + Express, Next.js route handlers, Fastify, Hono, FastAPI, etc. It must be able to:
Store secret keys (never in the add-on bundle).
Speak HTTPS in production.
Receive POST webhooks from the internet.
For local development, you can use a tunnel (ngrok, Cloudflare Tunnel, etc.) so webhooks can reach your local backend server.
2. A database
You will need a database that, at a minimum, ties an Adobe user ID to a billing state, for example:
Adobe user ID
Provider customer ID (once you have it)
Plan/subscription status
Optional: subscription ID, renewal dates, credits
3. A payment provider
You will need a payment provider; the architecture will be the same everywhere, only the API names will change.
Examples: Dodo Payments, Stripe, Paddle, Lemon Squeezy (merchant-of-record style products). Pick one, read their checkout + webhook docs, and mirror the steps below.
Step 1: Create products in the payment provider dashboard
Create your plans (monthly, yearly, whatever you sell). Copy each product or price ID, your backend will map "monthly" → that ID. For example, the shape might be: prod_... or whatever your dashboard shows.
Step 2: Environment variables (server only)
These are sensitive values your server needs to securely communicate with your payment provider. They should never be exposed to the client.
Typical names (rename to match your provider’s docs):
API secret key for server-to-server calls
Webhook signing secret
One env var per product/price id
Never put these in the add-on, never commit them to a public repo, and rotate them if they leak.
Step 3: Checkout API on your server
Next, you will need to run the checkout API on your server.
Example route: POST /api/create-checkout
Body (JSON): e.g. { "userId": "…", "plan": "monthly" }
The Server does this: validate input → map plan → provider product id → call provider API to create checkout session → return { "checkoutUrl": "https://…" }.
You’ll also set a return_url (or the provider’s equivalent) to a page on your domain that says “you’re done, go back to Express.” That page is not inside the add-on iframe.
Step 4: Open checkout from the add-on (easy to get wrong)
Here are two critical details:
A. Popup before await
Open a pop-up in the same user gesture as the button click. before you await fetch(...). If you await first, many browsers treat window.open as not user-initiated and block it.
B. Call your API with a full URL
You need your deployed API origin, e.g.:
fetch(“https://api.yourdomain.com/api/create-checkout", { … })
Example pattern:
const popup = window.open("about:blank", "billing", "width=1024,height=720");
if (!popup) {
  // Tell the user to allow popups for this site
  return;
}
const res = await fetch("https://api.yourdomain.com/api/create-checkout", {
  method: "POST",
  headers: { "Content-Type": "application/json" },
  body: JSON.stringify({ userId, plan: "monthly" }),
});
const data = await res.json();
if (data.checkoutUrl) {
  popup.location.href = data.checkoutUrl;
} else {
  popup.close();
}
Step 5: Webhooks (where many integrations break)
Route something like: POST /api/webhook. The path is up to you; register that full HTTPS URL in the payment provider dashboard.
Your server must:
Read the raw body as text/bytes for signature verification (don’t only parse JSON first if your library needs the raw string).
Verify the signature using the provider’s docs (do not skip this).
Handle duplicates; the same event may be delivered more than once; use idempotency (e.g., store event IDs you’ve already processed).
Update the database from the verified payload.
Step 6: Subscription data model
Here is a minimal mental model of the subscription data model:
User/billing row: Adobe user ID, provider customer ID, maybe email
Subscription row: provider subscription ID, status, plan, period end
Webhook log / processed ids: for idempotency
You can start with one wide users table and normalize later.
Step 7: Status API (source of truth)
This endpoint acts as the single source of truth for the client, returning the user’s actual billing state based on your backend data.
Example: GET /api/status?userId=…
Response might include isSubscribed, plan, credits, etc.
This must be read from your database (updated by webhooks).
Step 8: Sync the add-on after payment
After checkout, webhooks can take a few seconds. Here is a common pattern:
Poll
GET /api/statusevery few seconds for a short window, orRefresh when the user taps “I finished paying,” or
Optional: your
return_urlpage runs in the pop-up and usespostMessageto tell the add-on to refresh, only if you’re comfortable locking down which origins you accept.
Step 9: CORS (another easy mistake)
Browsers only allow your add-on to call your API if your server sends the right CORS headers.
Important: Access-Control-Allow-Origin does not support patterns like https://*.adobe-addons.com. You must either allow all origins using * (with some limitations) or specify one exact origin.
When you set up your add-on in Adobe Express, Adobe gives its own web address (URL).
Add that URL to your server’s allowed list. You will get that URL while creating the public listing of your add-on in the submission form (it usually looks like https://<id>.wxp.adobe-addons.com).
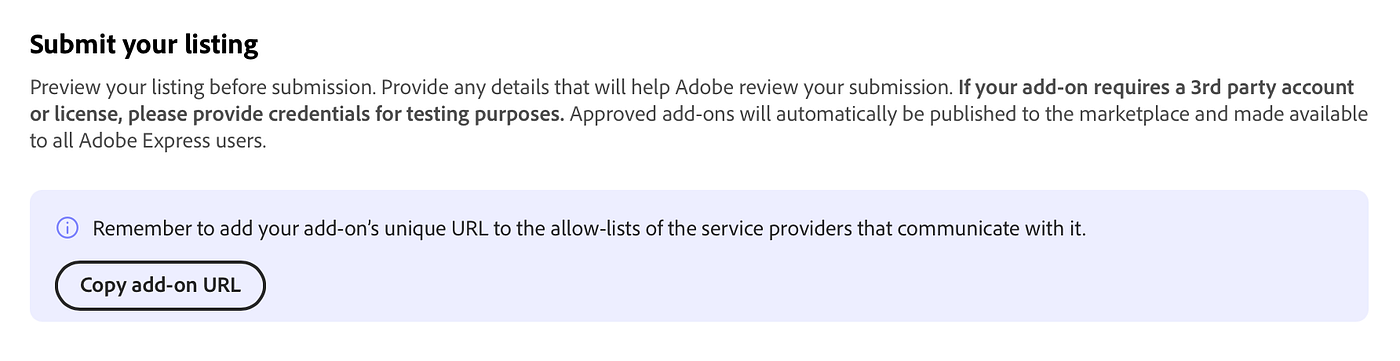
And you can simply allow all origins when you are building and testing your add-on.
Also, make sure your server accepts OPTIONS requests for GET and POST when sending JSON (Content-Type: application/json).
Details: https://developer.adobe.com/express/add-ons/docs/guides/learn/platform-concepts/context
Step 10: Manifest: allow popups
Hosted checkout opens in a new window. Your panel entry needs sandbox permissions, for example:
"permissions": {
"sandbox": ["allow-popups", "allow-popups-to-escape-sandbox"]
}
Exact structure lives in the manifest reference under your entryPoints panel config.
Nice-to-haves before you ship publicly
Customer portal link (cancel, update card), often required for a fair UX and aligns with transparency expectations in Adobe’s monetization guidelines.
Return URL page copy that matches success versus cancel.
Marketplace listing text that matches real pricing, renewal, and how to get support/refunds where applicable.
Common mistakes (and how to fix them)
Putting API keys in the add-on
What goes wrong: Anyone can inspect your frontend code and steal the key. That can lead to abuse, unexpected costs, and account compromise.
How to fix it: Move secret keys to your backend only. The add-on should call your backend, and your backend should call third-party APIs.
2. Using a relative fetch URL instead of your API’s full origin
What goes wrong: In Adobe Express, your add-on runs from Adobe’s hosted origin (iframe subdomain), so relative paths can hit the wrong place and fail with 404/CORS errors.
How to fix it: Use your full API URL (for example,
https://api.yourdomain.com/...) or a clear environment variable for it.
3. CORS wildcard misunderstanding
What goes wrong:
Access-Control-Allow-Origin: *is often unsafe, and it breaks credentialed requests (cookies/auth headers). It can also expose your API more than intended.How to fix it: Allowlist exact origins: your localhost during dev and your Adobe add-on origin (the
https://<id>.wxp.adobe-addons.comURL from Add-on Settings). Also handleOPTIONSpreflight properly.
4. No webhook verification or idempotency
What goes wrong: Attackers can send fake webhook calls, or real events can be delivered multiple times, causing duplicate credits/orders/subscription updates.
How to fix it: Verify webhook signatures, store processed event IDs, and ignore duplicates (idempotent handling).
5. Opening the pop-up after await fetch
What goes wrong: Browsers treat it as not user-initiated and block the pop-up, so login/checkout flows fail.
How to fix it: Open the pop-up immediately on user click, then update/navigate it after async work finishes.
6. Trusting the frontend for subscription state
What goes wrong: Users can tamper with the frontend state and unlock premium features without a valid payment.
How to fix it: Treat frontend state as display-only. Verify entitlement/subscription on your backend and return signed/validated access decisions.
Under the hood, you’re building three endpoints and one rule: create checkout, receive webhooks, read status, and always treat the database as truth after verified webhooks. Everything else is provider dashboards, env vars, and polish.
If you’re building something, I’d love to see it, whether it’s useful, experimental, or just something fun. Tag me on Twitter and LinkedIn, I’m always happy to give feedback and help promote new Express add-ons.
Now go build something you’re proud of.
Thank you for your attention to this matter. See you in the next one :)